As winter weather becomes undeniable, the snowy season is officially here. Snow days, often eagerly anticipated, open the door to a world where the crisp, white canvas of snow beckons for a touch of creativity and fun with the simple addition of color powder. A color powder snow day is one to remember with these activities.
Snowy canvas art is a wonderfully creative and even therapeutic way to use a fresh snowfall as a canvas for vibrant designs. By using color powder, you can paint temporary masterpieces on snow-covered surfaces, transforming a white landscape into a colorful display of art. Here’s a guide to creating your own snowy canvas art:
Gather up supplies. Materials Needed:
Find a flat, untouched snow-covered surface, such as a backyard, a park, or an open field. Ensure the area is safe and free from any winter hazards.
Before beginning, it’s helpful to have an idea or sketch of what you want to create. Consider the scale of your artwork – larger designs can be viewed from a distance, while smaller, detailed work might be for up-close viewing.
Mix the color powders with water in the spray or squeeze bottles. Adjust the concentration of the powder to water for the desired color intensity. Test the colors on a small patch of snow to see how they appear against the white background.
Start with lighter colors and gradually move to darker ones. This allows for layering and blending of colors. Use the spray bottles to apply color broadly, and squeezy bottles or brushes for more detailed work. Try different spraying techniques, such as misting for a soft look or direct spraying for more intense color.
Use stencils for precise shapes or patterns. Natural tools like branches or leaves can create interesting textures.
Since the artwork is temporary, take photos to capture your creation. The contrast of vibrant colors against the white snow can be striking. Experiment with different angles and lighting to best capture the essence of your snowy canvas art.
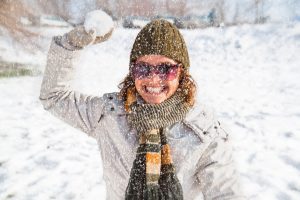 Transforming the traditional snowball fight into a lively and colorful competition with color powder (also called chalk powder). Here’s how to organize, play, and manage the aftermath of a colorful snowball fight:
Mix eco-friendly, non-toxic color powders with snow. Use separate buckets to mix snow with different color powders. This allows for a variety of colors. For more creativity, mix different colors to create new shades.
Establish boundaries for the play fight area. Select an open, spacious area that’s safe for running around, like a backyard or a park. Make sure there are no hazards like icy areas or hidden obstacles that can cause injuries.
Set clear rules, such as not throwing snowballs at the face to prevent injuries. Participants should wear waterproof gloves, boots, and winter clothing, as the color can make clothes wetter than usual.
You can play a free-for-all with each player having a unique snowball color. Or play in teams, each assigned a specific color. This can add a fun and competitive element to see which team can ‘color’ the opponents the most.
Have a plan for clean-up post-fight, as the color might spread beyond the play area. Provide towels or wipes for participants to clean up hands and faces before going indoors.
Creating a colorful snowman using color powder is an imaginative and creative activity that can bring a fun new twist to the traditional winter pastime of snowman building. Here’s how:
Mix Color Powder with Snow. Use different containers to mix snow with various bulk color powders to create a range of colored snow. Experiment by mixing powders to form unique shades.
Choose a spacious, open area like a garden, park, snow-covered field, or even your own yard. Ensure the area is safe, avoiding places with ice patches, deep snow, or hidden obstacles.
Gather accessories like scarves, hats, sticks for arms, and items for facial features.
Start by rolling three large snowballs for the base, midsection, and head of the snowman. Ensure they are compact and sturdy. Carefully stack the snowballs from largest to smallest.
Color each segment with your prepared colored snow. Apply the colored snow by patting it onto the surface of each snowball. You can color each segment a solid color, or experiment with patterns and designs using the color powder snow.
Decorate with more colored snow for features like eyes, buttons, or clothes. Use natural items or safe accessories for details. Try creating themed snowmen, like rainbow-colored, team colors, or holiday-themed designs.
Creating colorful snow angels is a whimsical and artistic way to add a burst of color to the winter landscape. This activity transforms the classic snow angel into a vibrant display of self-expression and creativity. Here’s how:
Have a variety of color powder colors available to encourage creativity. Participants can choose their favorite colors or mix them to create unique shades. Use color powder packets or squeeze bottles to make decorating designs easy. Or choose the Family Fun Pack that includes both packers and squeeze bottles.
Encourage participants to first think about how they want to use their colors. They can plan to sprinkle the powder in specific patterns or spread it more randomly.
Have each participant find a spot in the snow to make their angel. Ensure there’s enough space between each person to avoid overlapping designs or color powder cast off. Lie down on the snow and move your arms and legs back and forth to create the classic snow angel shape.
Once the angel shape is made, carefully stand up to avoid disturbing the design. Sprinkle color powder over the snow angel. This can be done in a variety of patterns, such as outlining the angel, filling in the wings, or creating a rainbow effect.
Allow for individual expression. Some might want a simple, single-color angel, while others might prefer a multicolored, detailed design. Consider using additional items like stencils to create more intricate patterns within the snow angel.
Creating color powder snow sculptures is an innovative way to express creativity and get active in the winter weather. By using color powder as an artistic medium, you can transform ordinary snow into vibrant, eye-catching sculptures. Here’s how:
Offer a variety of colors to inspire creativity, consider an assorted color packet pack. Participants can mix colors to create unique hues.
Encourage participants to plan their sculptures. This could range from abstract shapes to animals, mythical creatures, or other imaginative designs. Sketching the design beforehand can be helpful for complex sculptures.
Start by compacting the snow to create a solid base for the sculpture. Snow can be shaped by hand, or tools like shovels and sculpting tools can be used for more detailed work. For larger sculptures, create a rough outline first and gradually add details.
Once the basic shape is formed, apply the color powder to the snow. This can be done by sprinkling the powder directly or using a sieve for a more even distribution. For more intricate designs, mix the color powder with a little water to create a paste, which can be painted onto the sculpture for finer details.
Creating frozen color powder bubbles is a magical and enchanting winter activity. By adding color powder to the bubble solution, you can elevate the classic pastime of blowing bubbles into an extraordinary experience, especially in freezing temperatures. Here’s how:
Gently mix in an eco-friendly, non-toxic color powder into a bubble solution. The amount of powder will determine the intensity of the color. Experiment with different amounts to find the perfect balance.
This activity works best in freezing temperatures, ideally below 32°F (0°C). The colder the temperature, the quicker the bubbles will freeze. Choose a calm day with minimal wind for easier bubble-blowing and observation.
Use standard bubble wands or create your own from wire hangers or pipe cleaners for unique bubble shapes. Have multiple wands available if there are several participants to allow everyone a chance to create bubbles.
Dip the wand into the colored bubble solution and gently blow to create bubbles. Encourage participants to experiment with different techniques, such as blowing slowly for larger bubbles1 or quickly for a stream of smaller bubbles.
Watch as the bubbles freeze in the air or after they land. The freezing process can create fascinating patterns and designs. If it’s cold enough, bubbles may freeze mid-air and fall to the ground, retaining their shape.
This activity offers unique photographic opportunities. The combination of the colors, the delicate nature of the bubbles, and the crystalline patterns as they freeze are all visually interesting. Use a camera or smartphone to capture these moments. Experiment with different angles and lighting to highlight the beauty of the frozen color powder bubbles.
Creating a Color Powder Snow Volcano is not only a fun winter activity, but it’s also an opportunity to teach important scientific concepts in a hands-on manner. It encourages curiosity, creativity, and an appreciation for the natural world. Here’s a step-by-step guide to building your own color powder snow volcano:
Find a flat, open snow-covered area that’s safe and free from hazards. Round up color powder, baking soda, vinegar, dish soap, and warm water.
The location should be suitable for the potential mess from the eruption, ideally where the colored liquid won’t cause any harm.
Discuss the science behind volcanic eruptions. Explain how the combination of baking soda (a base) and vinegar (an acid) creates a chemical reaction, producing carbon dioxide gas which causes the eruption effect.
Shape the snow into a volcano structure. Ensure the base is wide and stable, tapering to a point at the top, with a hollow center to hold the eruption ingredients. The volcano should be big enough to contain the eruptive reaction without collapsing. Sprinkle color powder on the outside of the volcano. You can create patterns or layer different colors for a more artistic look.
Inside the crater of the volcano, place a cup or a small container. Add baking soda, a few drops of dish soap, and optional extra color powder. Pour warm water into the cup to dissolve the baking soda and mix well. When you’re ready to erupt, pour vinegar into the cup containing the baking soda solution.
The mixture will react, causing a colorful, bubbly eruption that flows down the sides of the snow volcano.
Encourage participants to observe the reaction and discuss the science behind it. Talk about real volcanic eruptions and how they compare to this simulated version.
Creating Color Powder Ice Lanterns is a beautiful way to light up a snowy evening. These enchanting decorations combine the natural beauty of ice with vibrant colors, providing a unique and charming addition to any winter setting. Here’s how to create your own:
Materials Needed:
Fill balloons or molds with water. Leave some space for the water to expand when it freezes. Add your choice of color powder to the water and shake or mix well to distribute the color evenly.
Place the filled balloons or molds in the freezer, or leave them outside if the temperature is below freezing. Allow enough time for the water to freeze completely. This may take several hours, depending on the size of the lanterns and the freezing conditions.
Once frozen, remove the ice from the molds. If using balloons, cut and peel them away from the ice. Create an opening at the top of each lantern large enough to insert a light. For thicker ice, you may need to let the lantern sit at room temperature briefly to create the opening.
Place a small LED candle or tealight inside each lantern. Battery-operated lights are recommended for safety and ease of use. If the lantern has a base, make sure it’s flat and stable to safely hold the light.
Position the lanterns outdoors where they can be admired. This could be along a walkway, on steps, or as part of a larger snow display. Ensure they are placed in safe locations where they won’t be a tripping hazard or exposed to high foot traffic.
Snow day activities can offer a blend of art, science, and play, transforming a blanket of snow into a canvas of endless possibilities. From creating unique art with snowy canvas art to rounding up a playful and vibrant colorful snowball fight, these activities provide an outlet for fun and creativity.